 Test Calendar »
Export Guide
Test Calendar »
Export Guide
Google Calendar
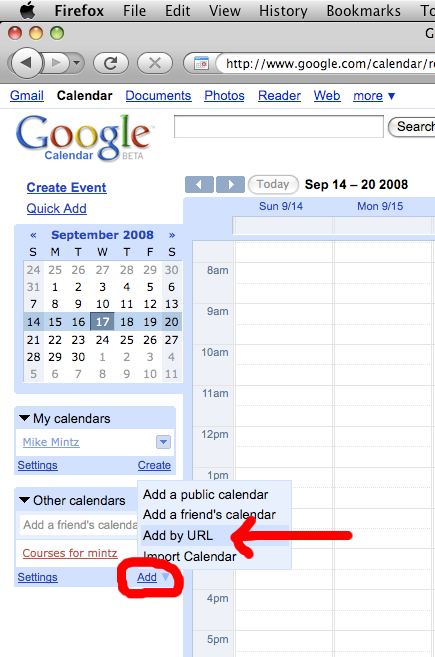
1. Log into Google Calendar, click the small "Add" link at the bottom left (circled below), and click "Add by URL" in the menu that pops up.
2. Type
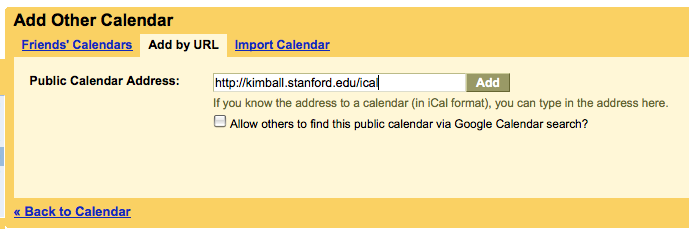
3. Press Add and you're done!
iCal (for Mac)
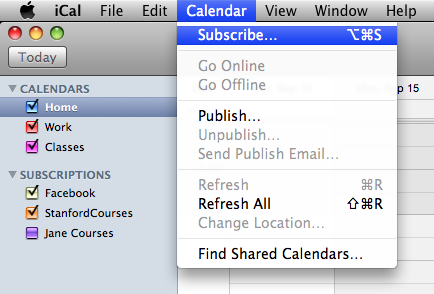
1. Open iCal (you can find it in your Applications folder), click on the Calendar menu, and select "Subscribe".
2. Type
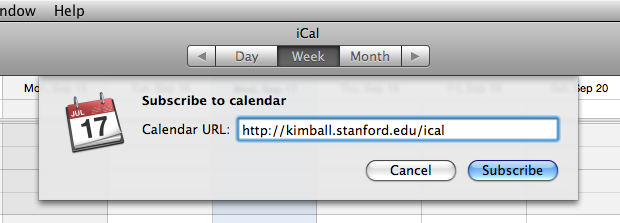
3. In the Auto-refresh select box, select "Every hour" or something similar to allow the calendar to update when users add events.
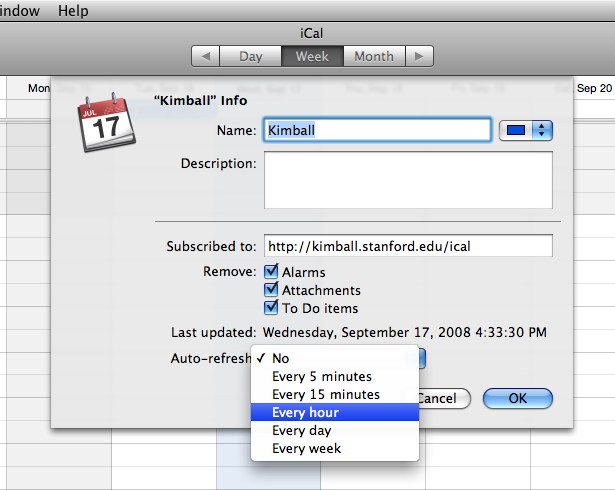
4. Press OK and you're done!
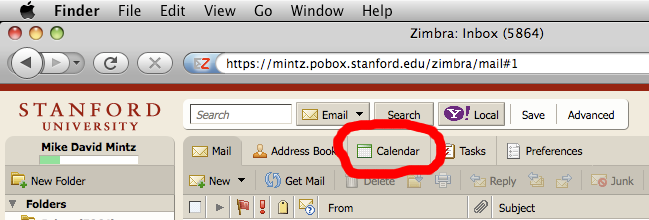
Stanford Webmail
1. Log into Webmail, and click on the Calendar tab at the top.
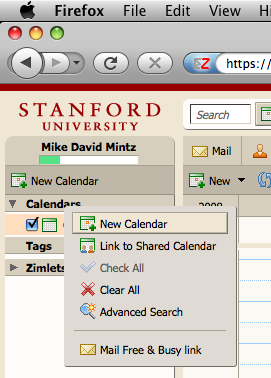
2. Right-click on the gray "Calendars" box, and click "New Calendar" in the menu that pops up.
3. Name your calendar, check the "Synchronize appointments from remote calendar" checkbox, and type
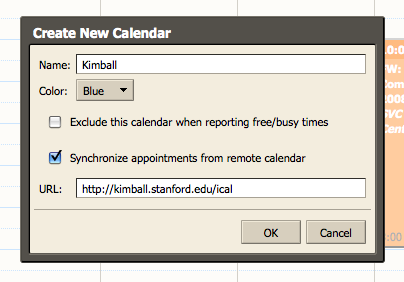
4. Press OK and you're done!
Other Applications
To export this calendar to other applications, you will have to find out how to import calendars. The calendar is stored at